Showing posts with label Background Removal. Show all posts

Friday, December 28, 2018

Background Remove The Quick Selection Method- For Images With Round or Wavy Edges

Okay, now let's say your image isn't as straight-edged as the image in the example above, and it's got some curve to it, like the image below. Here, you'll want to use the Quick Selection Tool.

Man with bag over head

1. Get your image ready in Photoshop.

Just like we did with the Polygonal Lasso method, the first thing you'll want to do after you drag and drop your image into Photoshop is convert it into a "Smart Object," and then rasterize it:
  1. Click on the Layer dropdown in your Photoshop menu, highlight Smart Objects, and then click Convert to Smart Object.
  2. Next, click on the Layer dropdown again, but this time, highlight Rasterize, and then click Smart Object. (See step 1 within the Polygonal Lasso method tutorial for screenshots if you're stuck.)

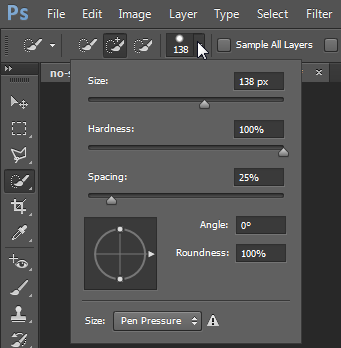
2. Choose the Quick Selection Tool from the toolbar on the left.

The Quick Selection Tool is right below the Polygonal Lasso Tool, and it looks like this:quick-selection-tool-button.png

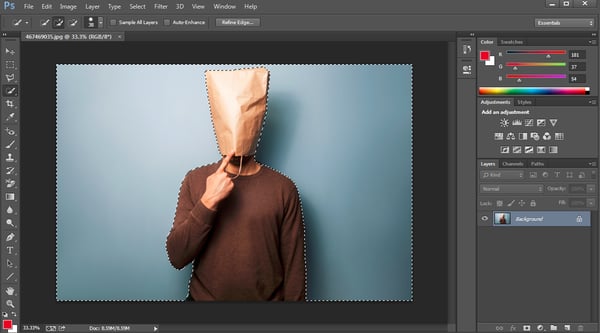
3. Click the background to highlight the part you want to make transparent.

This tool takes some getting used to, but once you get the hang of it, it's one of the fastest and easiest ways to remove the background from a photo.
Start clicking around on the background to highlight the parts you want to remove.
Quick selection to remove background from photo in Photoshop
Adjust the size of the selection tool accordingly. I recommend starting with a larger size, since that will allow you to select larger sections of your background at a time, speeding up the process.
quick-selection-size.png

Repeat this process until the entire background of the image is selected:
Highlighted foreground of image using quick selection tool in Photoshop

4. Subtract selections as needed.

Oops! Let's say you notice part of the image you want to keep is getting highlighted along with the background, like you see in the screenshot below.
Subtract From Selection option in Photoshop
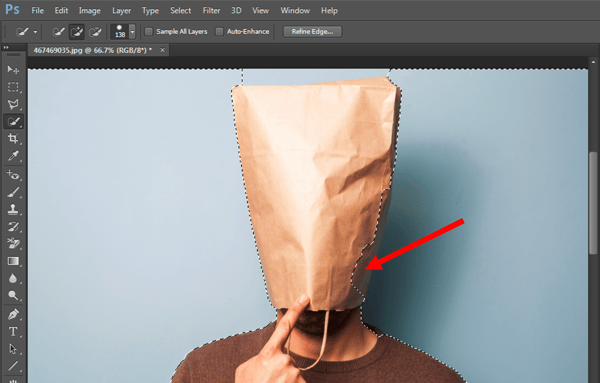
Have no fear -- you can subtract parts of the image that accidentally get highlighted:
First, click on the Subtract From Selection button in the toolbar at the top. (Alternatively, you can hold down alt while you click on a PC, or option while you click on a Mac.)
subtract-from-selection.png
This is also something that may take some getting used to, but the trick is to position your cursor right along the inner edges of the part of the image you want to keep. You may want to adjust the size of your Quick Selection tool for some of the finer details. Then click so the incorrectly highlighted section gets detracted.

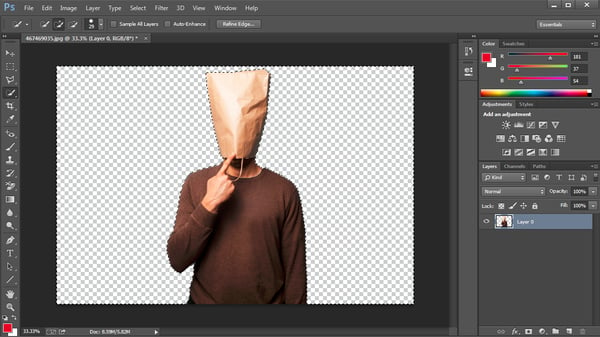
5. Delete the background.

Finally, click Delete on your keyboard to make the background transparent.
Photo with background removed using Quick Selection method in Photoshop

6. Save your image as a PNG file.

This will preserve the transparency of your background.

Background Remove

How to Make a Background Transparent in Adobe Photoshop CS6

Since Photoshop is considerably more refined than PowerPoint, there are a couple of various techniques you can use to make a foundation straightforward. Each is useful for an alternate sort of picture. Tap the connections underneath to hop to the instructional exercise for every technique:

The Polygonal Lasso strategy is extraordinary for pictures with straight edges.

The Quick Selection strategy is useful for pictures with round edges.

The Brush strategy is best for pictures whose edges require more accuracy.

The Polygonal Lasso Method: For Images With Straight Edges 

Suppose I need to expel the blue foundation (and additionally the post) from this "stop spam" picture.

Background Removal

Since this picture is made up completely of straight edges, this strategy for foundation evacuation is flawless. Here's the manner by which to make that blue foundation (and the silver shaft) straightforward.

1. Prepare your picture in Photoshop. 

The principal thing you'll need to do after you simplified your picture into Photoshop is convert it into a "Shrewd Object," and afterward rasterize it. Here's the secret:

Tap on the Layer dropdown in your Photoshop menu, feature Smart Objects, and after that click Convert to Smart Object.

Background Removal


Next, click on the Layer dropdown again, but this time, highlight Rasterize, and then click Smart Object.

Background Removal

Now you are able to convert that pestering background into a clear one.

2. focus on your image thus you'll be able to be additional precise along with your background removal.
You can focus and out by clicking the read dropdown and selecting focus or Zoom Out, or victimization the keyboard shortcuts as indicated.

3. choose the two-dimensional figure Lasso Tool from the toolbar on the left.
The two-dimensional figure Lasso Tool sounds like this: polygonal-lasso-tool.png

Once designated, click on a place to begin, and trace the a part of the image you would like to stay employing a series of clicks from purpose to purpose. I like better to get obviate the black come close the stop sign, thus i am tracing the sign simply within the outer reaches of the white border.


Background Removal

4. Connect the line with your starting point.


Once you've made it all the way around your image, connect your line to the first point you started with. You'll know it's connected when your cursor includes a little circle, as shown below.
Background Removal
Once you connect your line to your first point, a flashing dashed line will form around your image, like so ...
Background Removal

5. Select the background you want to delete.

Do this by clicking the Select dropdown in the top menu, and clicking Inverse. This will highlight the entire background you want to make transparent.
Background Removal

6. Delete the background.

Hit Delete on your keyboard, and the background will turn into a checkered grid like you see below. This is how you'll know your background is now transparent.
Background Removal
Add caption